Welcome to the world of 3d-scanning! You think, you need a lot of money for this? With a decent camera and some reasonable scanning software you might get started soon enough!
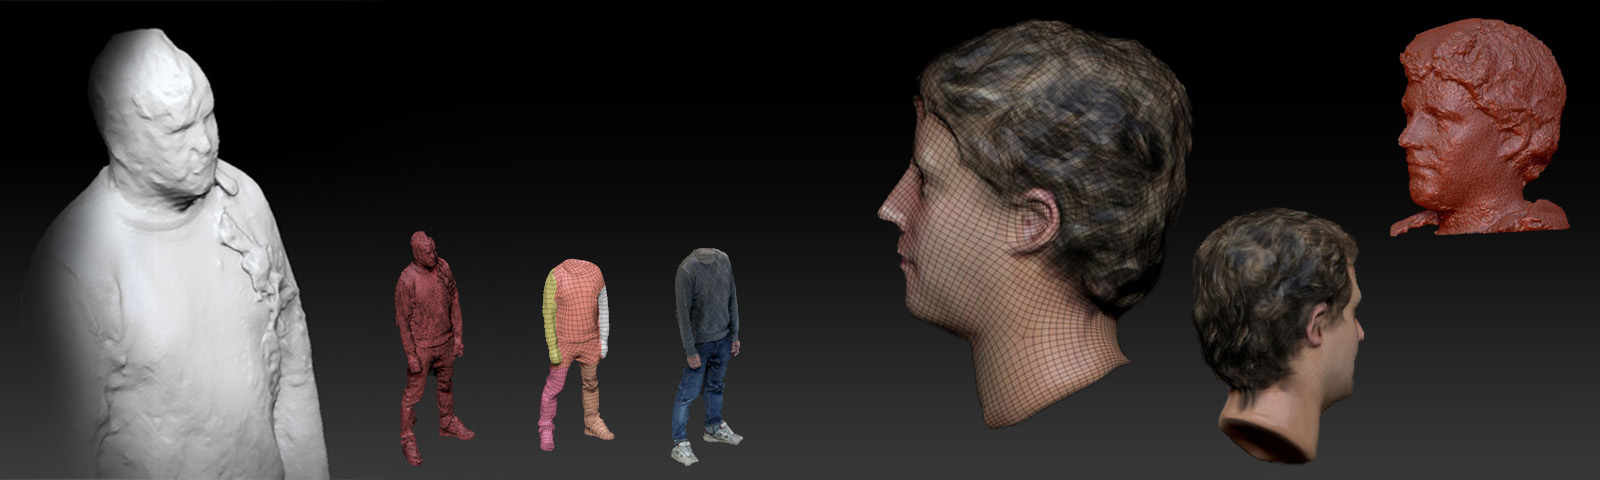
Here is quick runthrough, how we did our 3d-people during the last couple of months. You can download them in this post for your personal use!
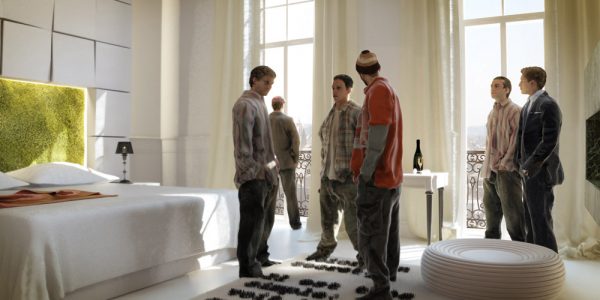
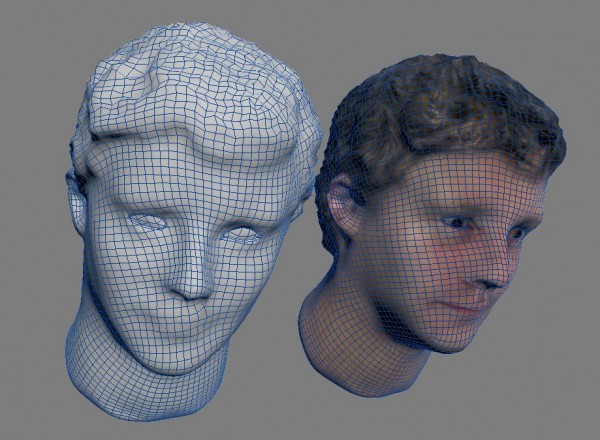
All CGI including our scanned crew- looks like we are up to no good :)
Honestly, our scans are far from perfect. The ones you get from AXYZ-Design and other quality suppliers surely are better in many concerns. But you can always continue tweaking the results to improve your scans. For us, one objective of our study was to stick as much to automated computation-processes as possible. So we decided to wrap up what we do have and share our insights. We also want to point out several dead ends we ran into, and help others to avoid some of the errors we have been doing:
A) Objectives
That’s what we wanted to achieve:
- Scanning of textured people into 3d to share with the community
- Minimal budget excluding software and hardware licenses
- Using mainly automatic processes to avoid manual retouching
B) Stuff you might need:
- Canon 7d
- PC-workstation
- Agisoft Photoscan (Software)
- Zbrush (Software, optional)
- Photoshop (Software, optional)
- 3d Modelling and Rendering Software
- Coloured cloths and garments
- Bob (?)
C) Choice of scanning tool:
We tried several softwares here, that would all lie within an affordable budget. It was part of our internal brief that it shouldn’t cost much and make use of tools that were present at xoio.
Among others we rented a kinect to scan people. But the scans crashed a lot before completion. Additionally we gave the Autodesk 123-tool a shot. That kind of worked, but options were very limited and results were kind of rough, too.
In the end we chose to use Agisoft Photoscan, which offered some options and seemed to get the best results for our needs. And I really think, that these 179$ are little money if you want to get real about 3d-scanning.
D) AGI-soft – quick overview:
Let me quickly give you a quick introduction to Photoscan: Basically the software uses multiple photos from an object to reconstruct a textured 3d-model.
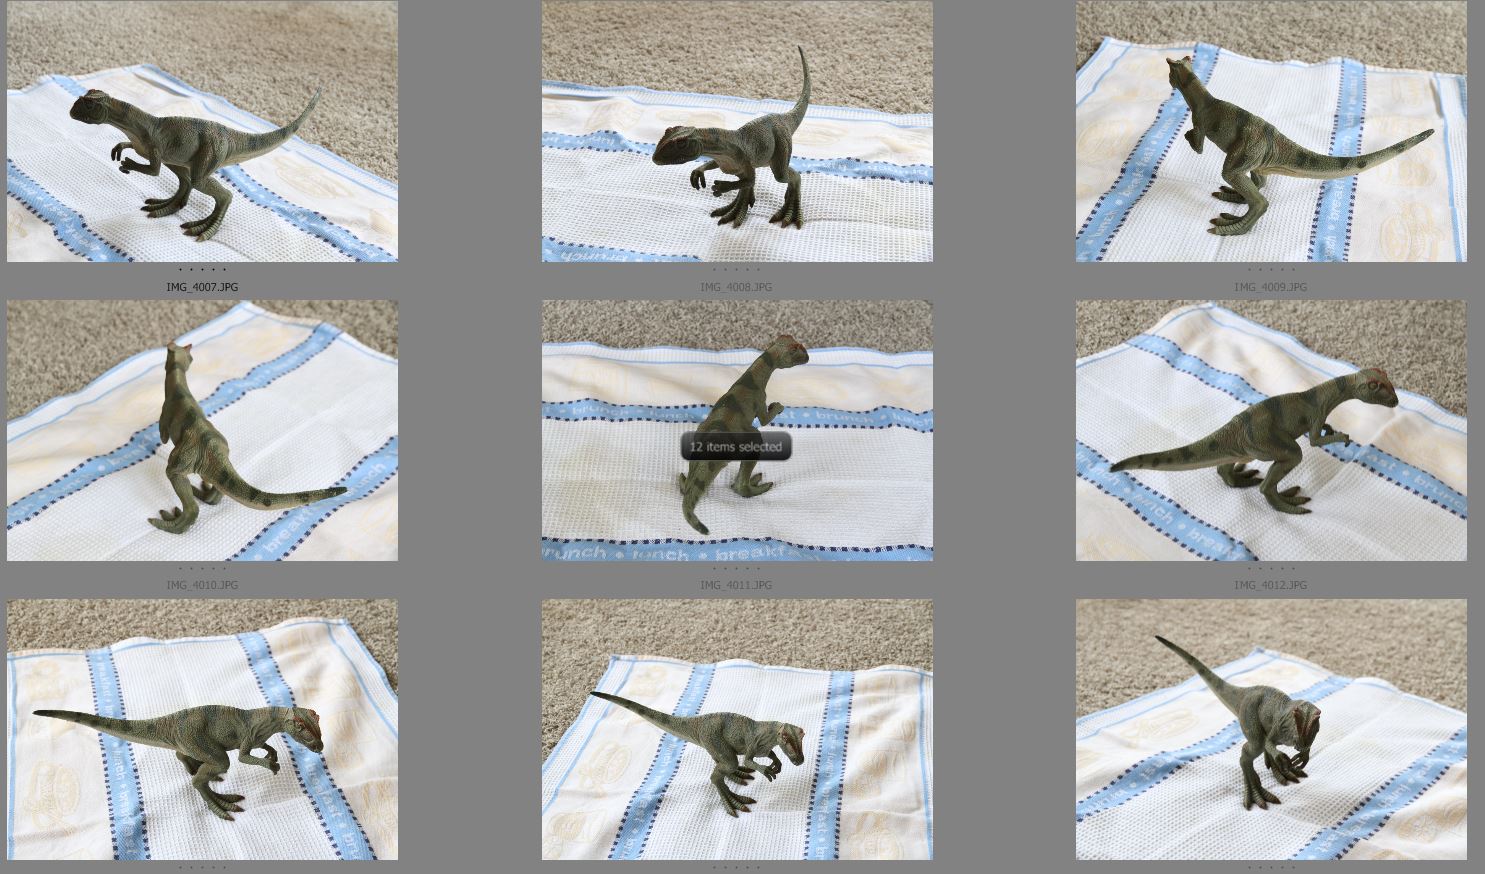
Part of a image sequence you might use for Photoscan
It works in multiple steps:
1. Importing Images
2. Reconstructing cameras: Images are analysed and contrasty points are compared. This information is used to estimate viewing angles of photos. Cameras and valid points are displayed to doublecheck.
3. Depth map construction: A Z-Buffer is reconstructed for each image. This takes some processing time.
4. Mesh reconstruction: Per default in one go with 3. A 3d-mesh is built.
5. Texture Altas: A quick UV-Unwrap is done of the mesh and a detailed texture map is generated and applied.
6. Export: Mesh and Texture can be exported as OBJ and a common imageformat.
The programm has not too many options, but they really serve the purpose well. You can for example set up a processing batch which allows you to process many scans overnight.

An early test we did which worked wonderfully with this toy-dino. Please consider, this dino has almost no reflection; the same goes for the cloth underneath. These are perfect preconditions for our purpose.
E) Scanning Issues:
Using AGIsoft you quickly encounter some aspects to consider:
- Transparency doesn’t work.
- Also reflective surfaces need to be avoided, too.
- Monochrome surfaces or surfaces with little color variation probably become tricky.
- Make sure to cover your model completely from every angle.
- Try to cover your model in whole, avoid detail shots.
- Try to have at least 30 images in total.
All in all it’s actually quite logic: Agisoft is looking for color values and color contrasts to compare from image to image. So it’s best if you can provide consistent color information between images – highly diffuse opaque objects work best.

The first result shows cameras and a point cloud. This is a good value of detection points. As you can see the belly region of the dino is less dense resulting in some artefacts lateron. In fact you tend to forget areas to shoot that are difficult to access.
Specific issues when scanning life objects :
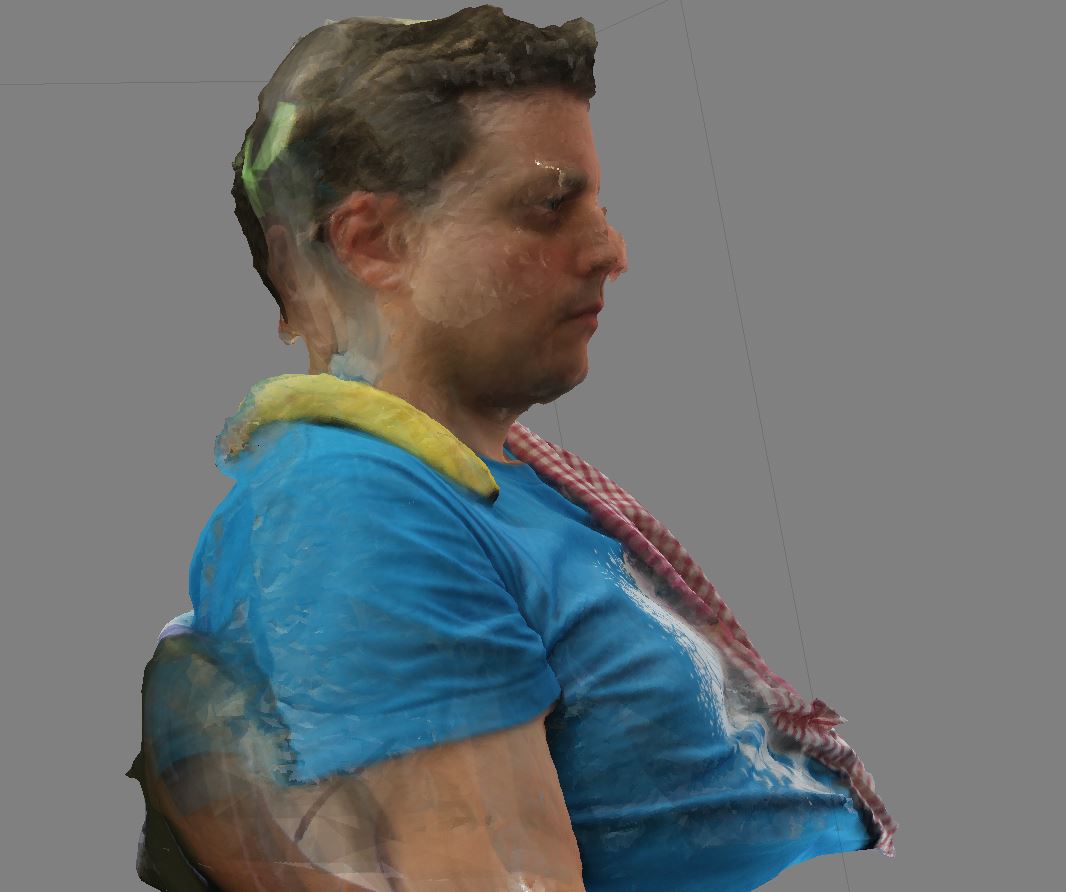
The first batch of people of tried to scan oftenly showed the same patterns: The feet were doing alright but the more we got towards the head the more erratic the results became. In fact we got some freaking spooky results there. Seriously, you can gather a whole crew of a freakshow with chopped-off skulls, twin faces and badly convoulted features. While certainly entertaining, it wasn’t really what we were looking for. We assumed that the minor swaying movement of a standing body are enough to create artefacts, especially around details as noses and ears.
Now that happened a lot – sad guy, he is. Skin is quite tricky indeed.
Additionally we witnessed that hair tended to become screwed. We guess it’s due to the volumetric nature of hairs which make it hard to pinpoint exact surface color-information. Skin is similar, due to its subsurface influence. Hey, look at the bright side, you really learn a lot about shading here :).
F) Tackling scanning issues:
That’s how we tackled the problems at hand:
1.) Adding Color info for scanning:
We witnessed some scans showed a lower density of matching points, especially when scanning single colored material – or even worse skin and hair. We realised it probably helps a lot to use clothes which hold a lot of color-contrast information. That maybe explains the hawaii-shirts and the camouflage a bit.
A first result in AGI-Soft which was actually kind of ok. The banana is absolutely imperative to achieve acceptable results.
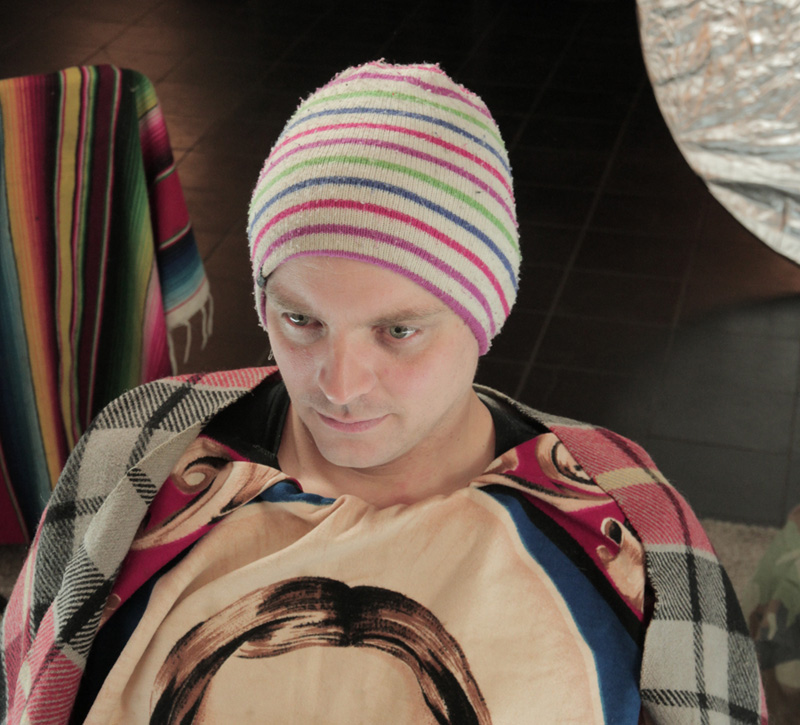
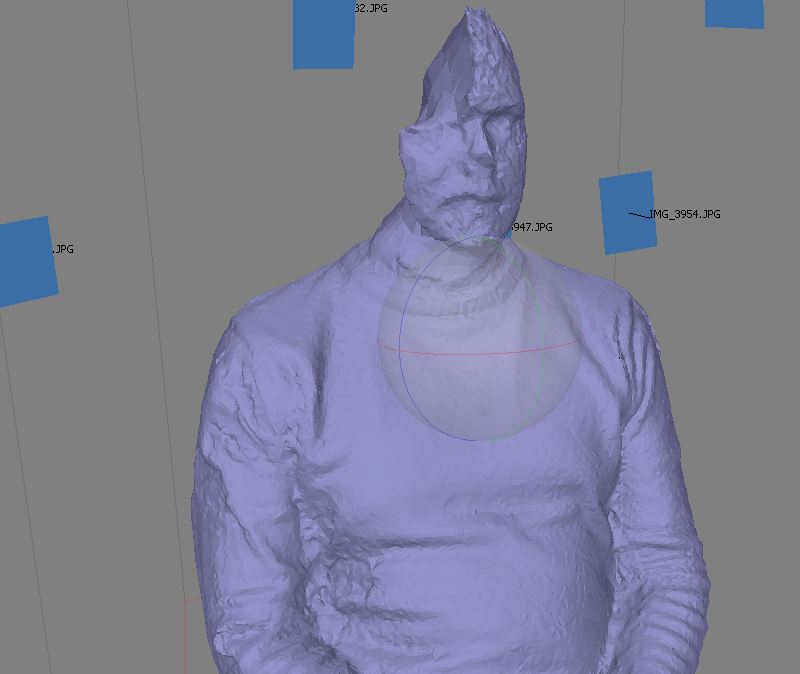
We shot the heads separately. Please consider all the extra color info added by the blankets to help AGI-Soft recognising the camera angle.
To help AGI-Soft further we tried to provide extra colorinfo outside our area of interest. When shooting the faces we wrapped our guys in these psychadelic blankets, so AGI-Soft had an easier job detecting valuable info.
Last but not least we applied some stickers into the hairs to help in the problematic spots of hair volume. These were removed later in the post.

We used Post-its to help Agisoft in difficult regions like hair. I figure it helped to stitch some areas here.
2. Avoiding Movement:
Admittedly we had major issues with movement. I was kind of impossible to shoot a standing person without getting crazy artifacts on the upper part of the body. The unavoidable movements mostly ruined the whole sequence and unfortunately we only knew for sure after processing the whole batch. Other studios do shoot with an array of cameras to get the whole footage in one instant – thus eliminating movement issues. But we didn’t have that hardware, obviously.
So we decided to split the models. We had feasible results for the heads and a few bodies, but these needed a lot of cleaning. So we decided to try something else for the bodies.
That’s where “Bob” became part of the team: We evidently purchased this supercheap bodybag – very literally spoken. We browsed through some dodgy websites to get some kind of “body” we could use and ended up using this halloween-product . A couple of meters of strong wire provided a basic skeleton that we could adjust. The rest of the bag was stuffed with newspaper, which admittelty resulted in some strange proportions, even when put in clothes. Just a couple of minutes old our new teammember was then hanged again to remain standing and we suspended him from a thin wire from our rig. This bloke had a horrible posture and rather reminded us of some hillybilly you might meet somewhere in the outback – something we hoped we could fix later in Zbrush.
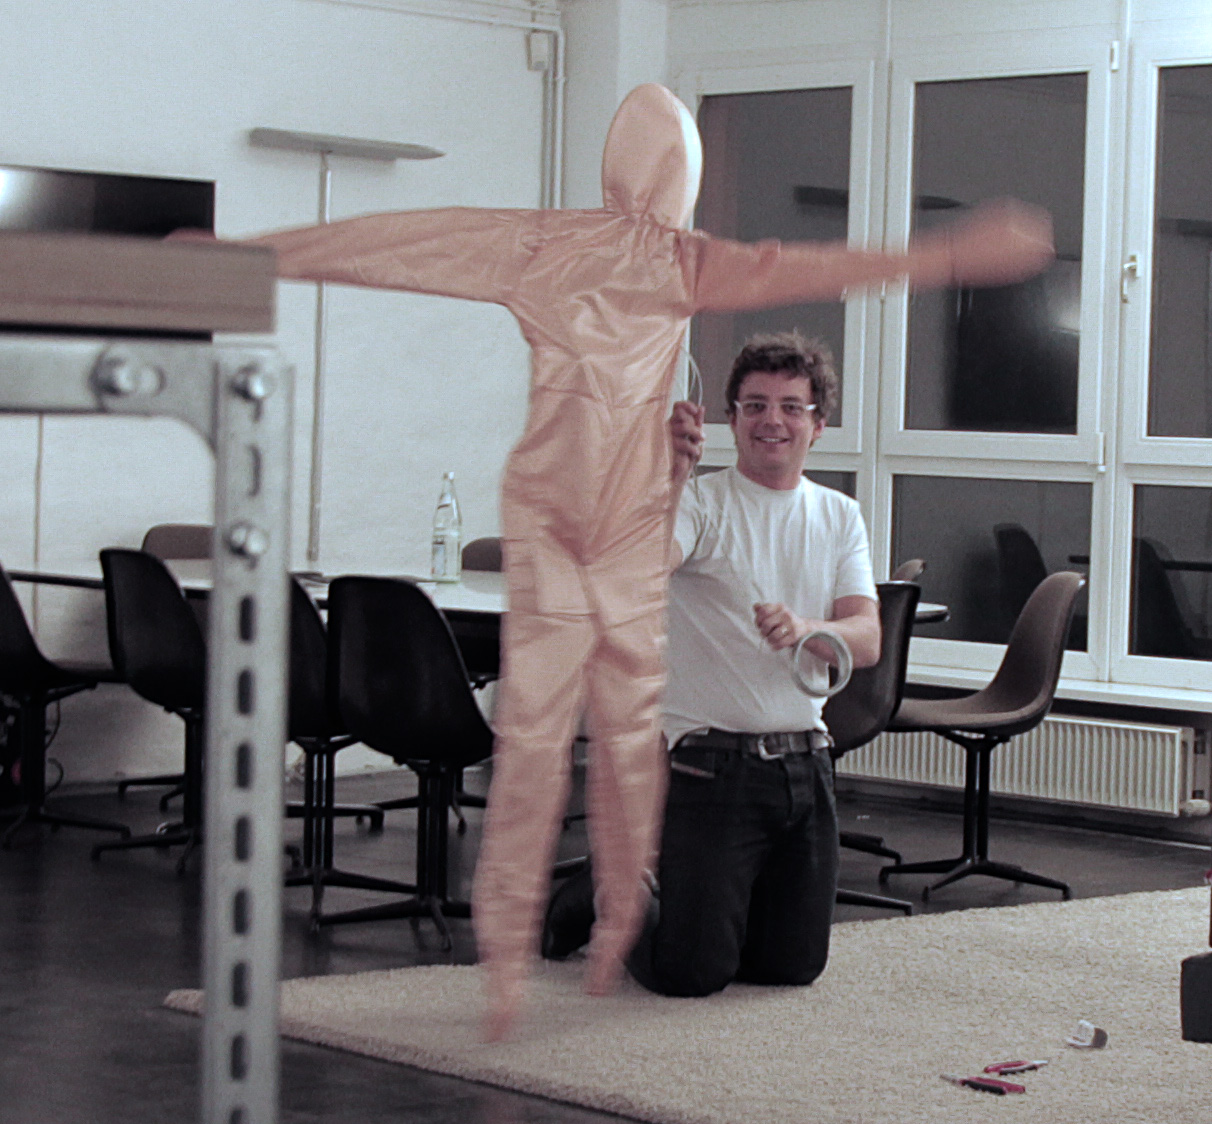
Our new teammember just got “rigged”
not quite there yet; what a miserable posture
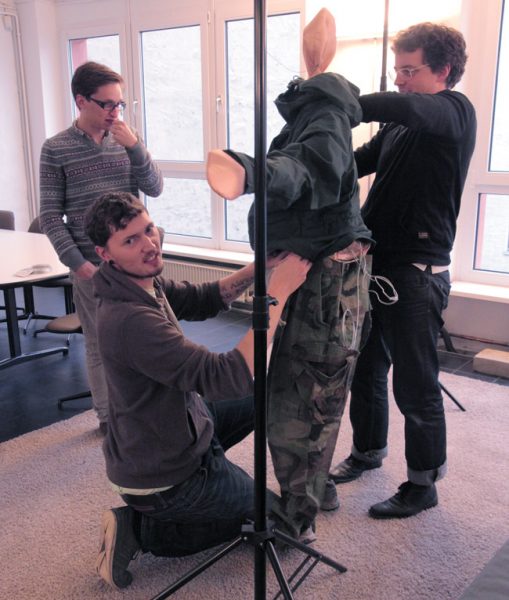
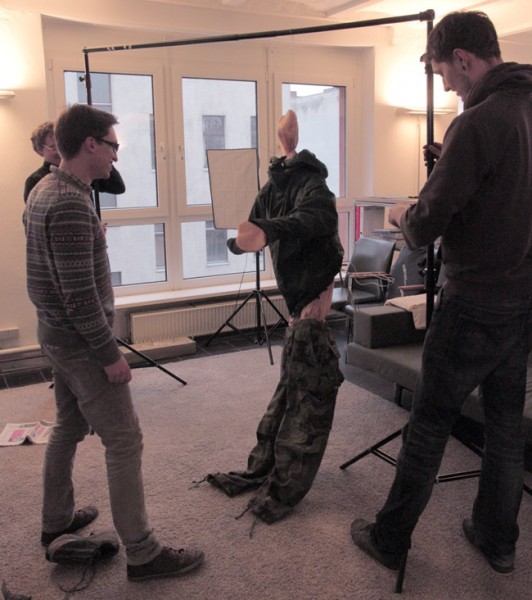
Hang him higher! In fact we got really worried about our neighbours calling the cops.
The photoset looked ridiculous with all the colourfull blankets and this strange puppet – definitely not like some pros being at work here. But then, it was such a relief to see that the scans worked instantly better than anything we had before.
In the end – when we were more familiar with all the tools in ZBrush – we managed to actually get some reasonable results from real people, but they needed a lot of cleaning, while the puppet-scans were quite ok right out of Photoscan.
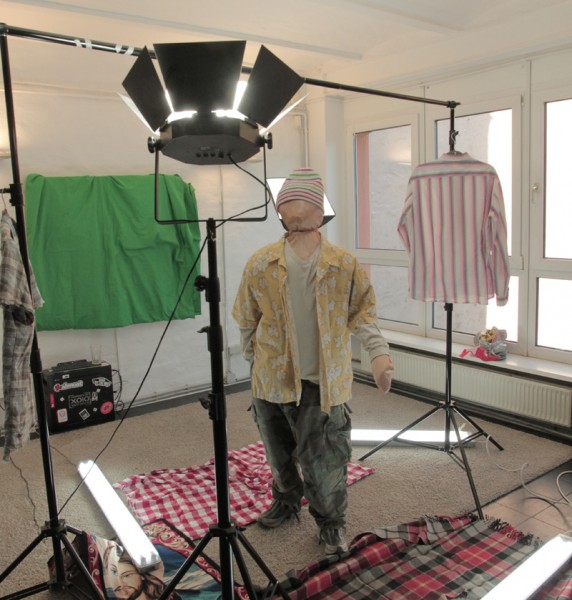
The final setup which looks like the exact opposite to a proper photoset. But all the clothes helped to improve camera detection.
G) Postprocessing in ZBrush:
Postprocessing took way longer than we hoped for. You could still use the obj directly that AGI-Soft produces, but these meshes were in most cases pretty rough. The UVs that AGI-Soft does serve the purpose – but there is room for improvement. We took this as an opportunity to do some practise with Zbrush. We have been owning a license for ages now, without ever really using it. It’s such an amazing programm, that has got all these incredible topology and unwrapping tools, that we finally wanted to try out.
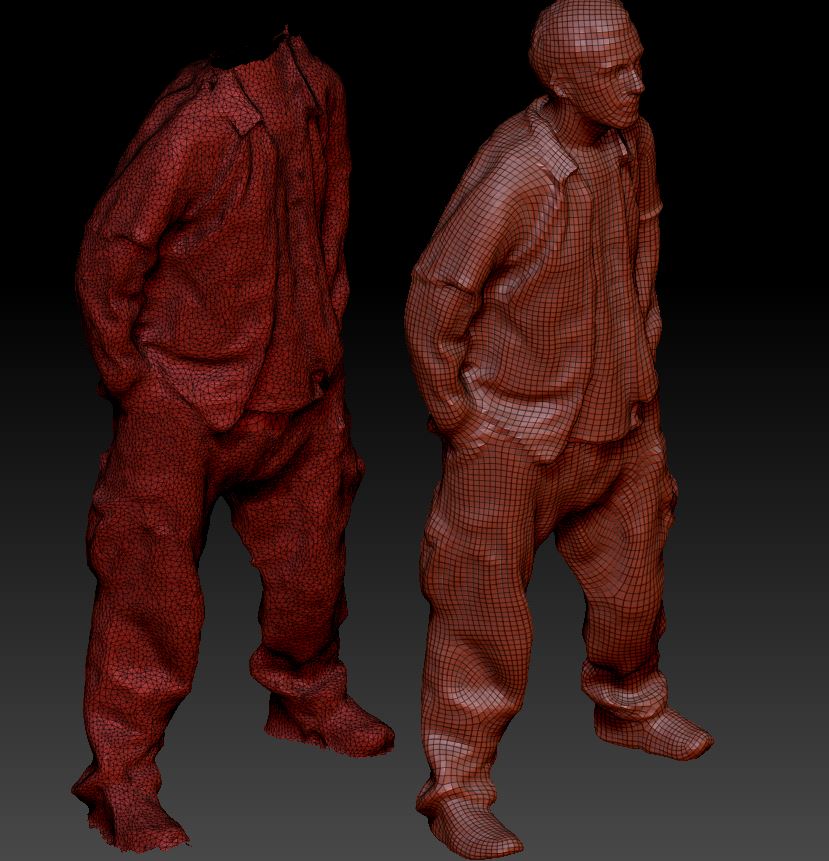
Zbrush is amazing. It turns the left mesh into something useable within seconds – 99% automatically !
We can only show some screenshots here. What we did in ZBrush:
- Cleaning and Smoothing
- Quick retopologizing via ZRemesher
- Unwrapping
- Fixing mesherrors and holes
- Polypainting and fixing diffuse channel
- Reprojecting onto clean mesh
- Export to 3ds-Max
Now don’t misunderstand us here: You can skip all of this – or most – and go directly to Max. AGI-Soft issues quite impressive OBJs by itself and the textures are pretty fine, too. But we wanted to see what ZBrush could make out of this. And we can only recommend it. If you want to understand ZBrush better, there are tons of great tutorials online.
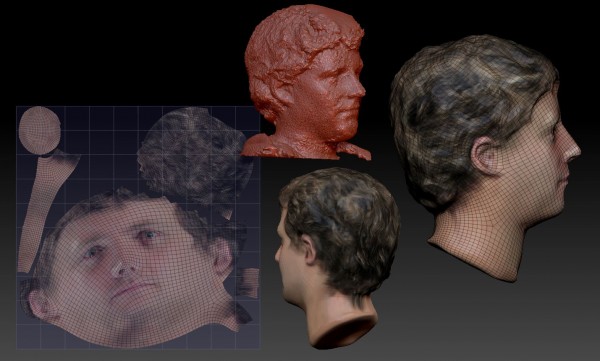
The workflow we used inside Zbrush. The red clay is the import mesh which was retopologized, unwrapped, and then reprojected / -painted.
Then finally the models arrived in 3ds-Max, final destination. Doing some initial rendertests you realize we are still deep in the uncanny valley … and it is a steep climb out, trust me. To improve the overall look, we divided the mesh into several parts to make use of a skin shader and a glossy section for the eyes. In fact we decided to cut the eyes out quite crudely, but otherwise the eye-section always looked super-spookey.
The quadbased topology got screwed badly by cutting the eyes out – in fact it’s a pretty sick feeling to do that. But the overall look benefits.
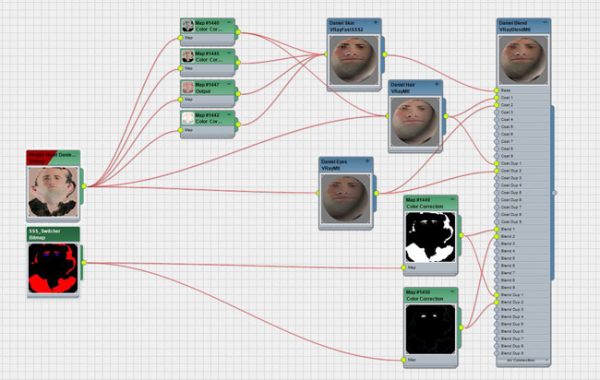
A shadertree for one of the heads. It’s all based on two maps to the left.
In the end I had to force myself not to push this on for ever. There is so much you could still improve here: better topology, better textures, finer details and so much more. Hair certainly would be a major step.
We decided to leave it at this stage and publish the characters as they are. To conclude the project we rendered the characters in several lighting setups to check if the shaders work. Obviously there is always room for improvement but we are happy for now. Let’s see how far we can push this next time :).
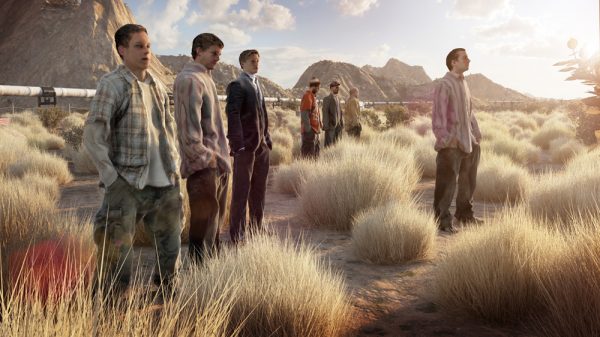
The crew in a typical breaking bad scenario … where is the bloody campervan?
We hope we could give you some insight into our processes and there is something of interest in this little research-project. Best regards, Team xoio
copyright, 2014 by xoio, Peter Stulz

After his modelling career we managed to employ Bob as our new IT-guy in our server room. There he regularly freaks out people who enter unprepared :).
Comments
- Pingback3d-people model set | xoio-air
- Pingback10 modelli 3D GRATUITI di gente | Imaginaction
- PingbackDownload eight free 3D characters from xoio-air | Gaming forum | Gaming environments | Gaming | characters | New Delhi | India
- Pingbackمجموعة 3d-people model set مجانية
- PingbackTài nguyên: XOIO – tài nguyên miễn phí, cập nhật thường xuyên | VIZVA
- Pingback3d-People Model Set I xoio | architektT